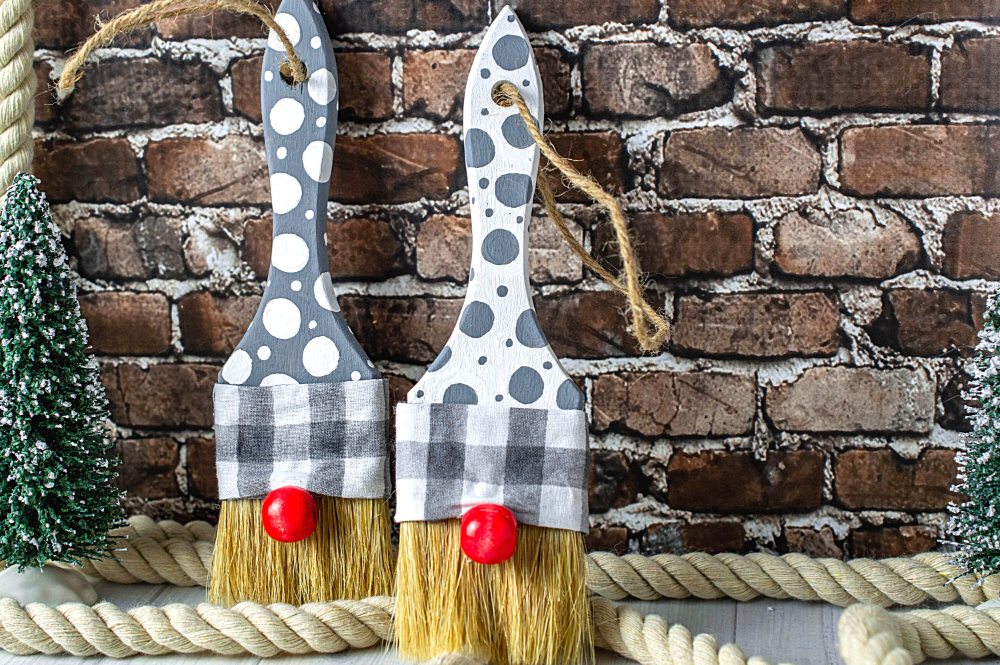
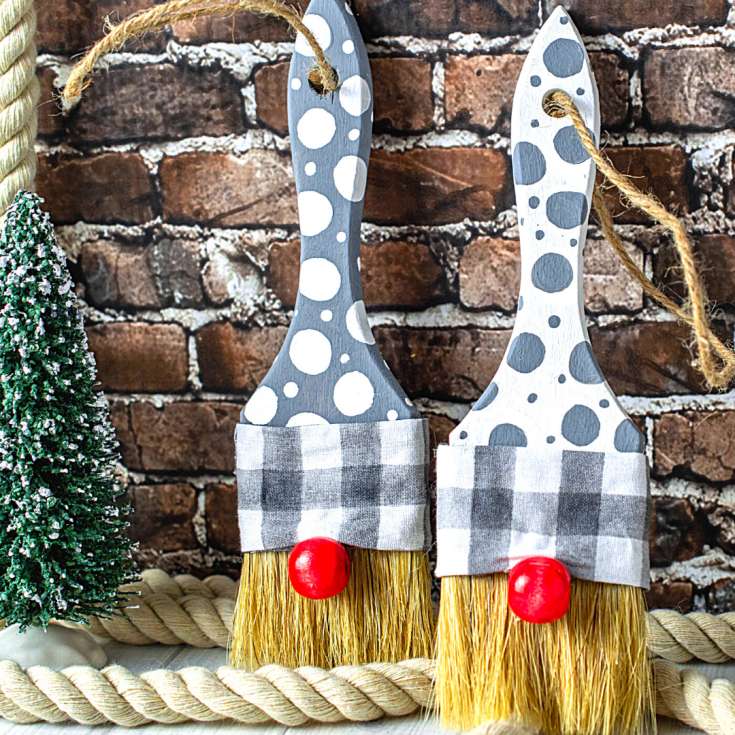
Take dollar store paintbrushes and turn them into adorable Paintbrush Gnomes for decor! This color scheme works great for Christmas or winter decorations, or change it up for any kind of decor.
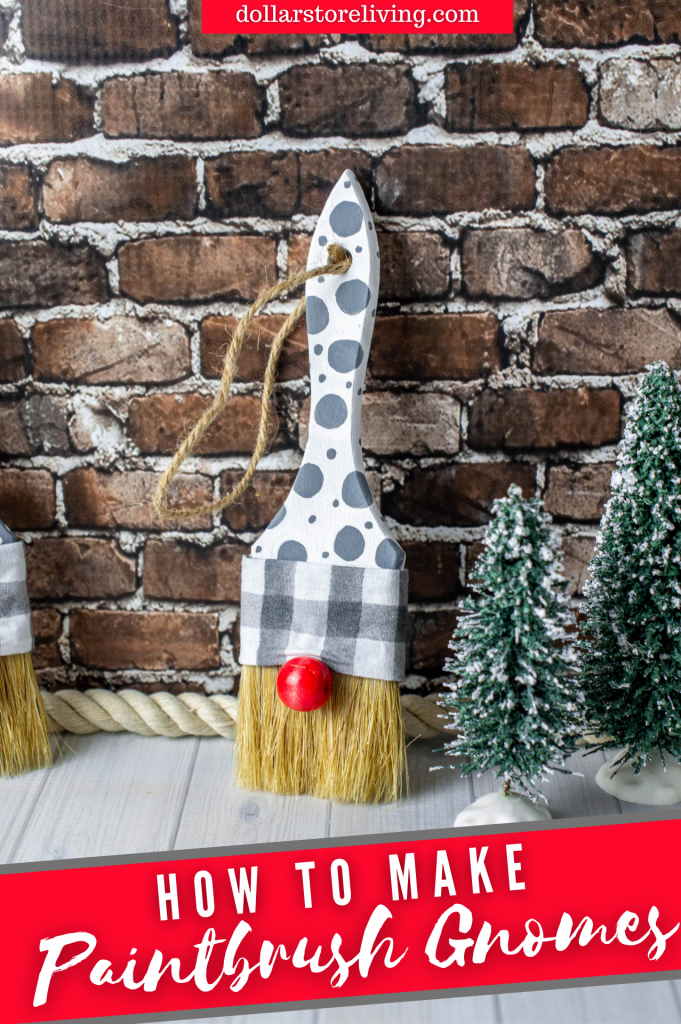
Do you love gnomes? I do. They are so cute and so easy to make, especially as paintbrush decor!
What can you do with Paintbrush Gnomes?
These are super cute to hang on the Christmas tree in “Santa” or Christmas colors. They also work for Halloween or any time if you use different paint colors!
They work for so many things, even great for decorations on the mantle! I like to hang three in a row.
What do you need to make Paintbrush Gnomes?
You can get most of these supplies at the Dollar Tree like the paint brushes, the wooden beads, and the ribbon. You also will need additional paint brushes and/or foam brushes, which you can also find at the Dollar Tree.
However, there are a couple things I can’t find at the dollar stores.
I have yet to find good acrylic craft paint there, so I buy the cheapie Apple Barrel brand that’s usually about 50 cents at Walmart or the craft stores.
The other thing is a fat quarter of fabric, which you can get for about a dollar at Walmart or the fabric stores.
If you are a bit klutzy like me, you might want to get some hot glue caps to put on your fingers to prevent burns. You can even find them at the Dollar Tree.
How do you make the Paintbrush Gnomes?
I chose gray and white for a winter or Christmas-themed color. But, you can make these in all the whimsical colors you’d like with whatever fabric goes with your paint colors.
You’ll begin by painting one chip brush gray and the other white. Then, set them aside to dry for a couple hours.
After they are dry, paint circles on each chip brush with the opposite paint color. I found using the end of the foam brush to make the circles was the easiest way by just dipping the end of the brush into paint and pressing onto the handle, or you can wing it and freehand the circles.
To darken the circles, use a smaller paintbrush.
Use a smaller paintbrush to add small dots by dipping the end into paint and pushing onto the brush.
Now let those circles dry completely for a couple hours.
When the paint is completely dry, cut two pieces of fabric. Wrap around the metal part of the brush to measure the length. Cut the width a little bit longer than needed, so you can glue the seams down so they don’t fray.
Carefully hot glue the top and bottom edges of the fabric and press over to create an even seam. No need to glue the sides, as they will be hidden in the back.
Add hot glue to the metal part of the brush and wrap fabric around, securing the ends in the back with more glue.

Pull up the fabric a little where the nose is going to go and glue the bead to the center of the brush bristles. Make sure to make it so the holes are on the sides.
To finish it, cut a piece of twine 8-10 inches, or as long as you want the loop, and tie at the top.
Now it’s time to hang them up — either on the Christmas tree or a garland or even on the wall.
More Christmas Ideas
Paintbrush Gnome
Materials
- Paint brushes (Dollar Tree 2” Chip Brush 2pc Set)
- 2 red beads (Largest size of the Dollar Tree 125pc multi colored wood beads)
- Fabric (used fat quarter from Walmart, but they have fabric at Dollar Tree)
- Elephant Gray acrylic paint (Apple Barrel brand)
- Snow White acrylic paint (Apple Barrel brand)
- Twine or ribbon
Tools
- Hot glue gun
- Glue sticks
- Small paint brush
- Foam paint brush* (from Dollar tree - optional)
- Scissors
Instructions
Paint one chip brush gray and the other white. Set aside and let dry.
Once dry, paint circles on each chip brush with the opposite paint color.
Use the back of a foam brush to make circles by dipping the end of the brush into paint and pressing onto the handle, or freehand the circles.
To darken the circles, use a smaller paintbrush.
Use the back of the smaller paintbrush to fill with small dots by dipping end into paint and pushing onto the brush. Set aside and let dry.
While they dry, cut two pieces of fabric. Wrap around the metal part of the brush to measure the length. Cut the width a little bit longer than needed, so you can glue the seams so they don’t fray.
Carefully hot glue the top and bottom edges of the fabric and press over to create an even seam. No need to glue the sides, as they will be hidden in the back.
Add hot glue to the metal part of the brush and wrap fabric around, securing the ends in the back with more glue.
Pull up the fabric a little where the nose is going to go and glue the bead to the center of the brush bristles, holes out to the sides.
Finally, cut a piece of twine 8-10 inches, or as long as you want the loop, and tie at the top.
Notes
Be careful when working with the hot glue. They sell caps that you put on your fingers at some Dollar Tree stores!
Liked this article and want more? Follow along on Instagram, Facebook, Twitter, Pinterest, and YouTube!