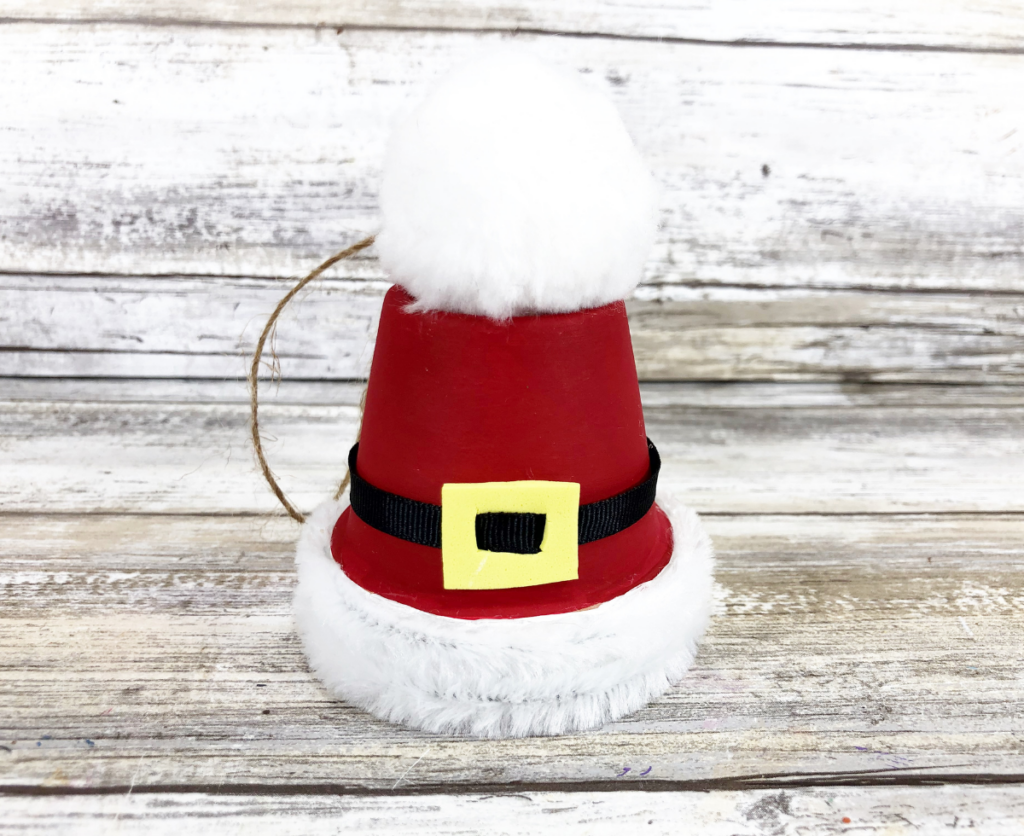
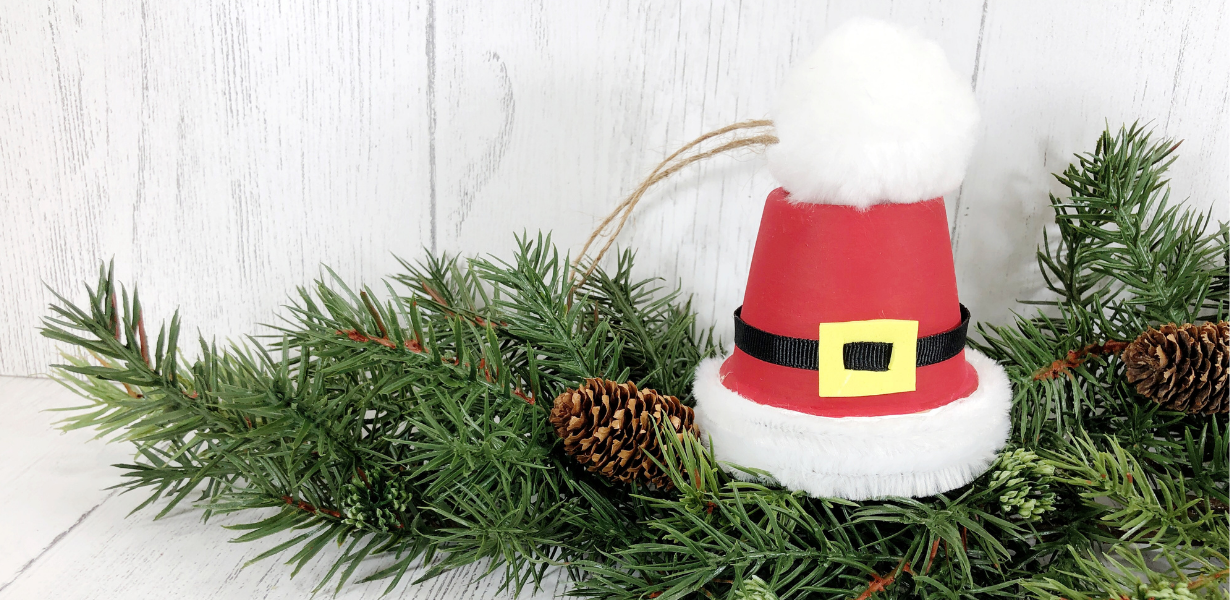
I just love making homemade ornaments. This Clay Pot Santa Hat Christmas Ornament is fun to make for Both adults and kids!

My kids love making homemade ornaments, and these are perfect for just that, since you can get the supplies at the dollar store.
What supplies do you need to make this Clay Pot Santa Hat Christmas Ornament?
You can make 3 total Clay Pot Santa Hat ornaments with these supplies as these clay pots come in a pack of 3.
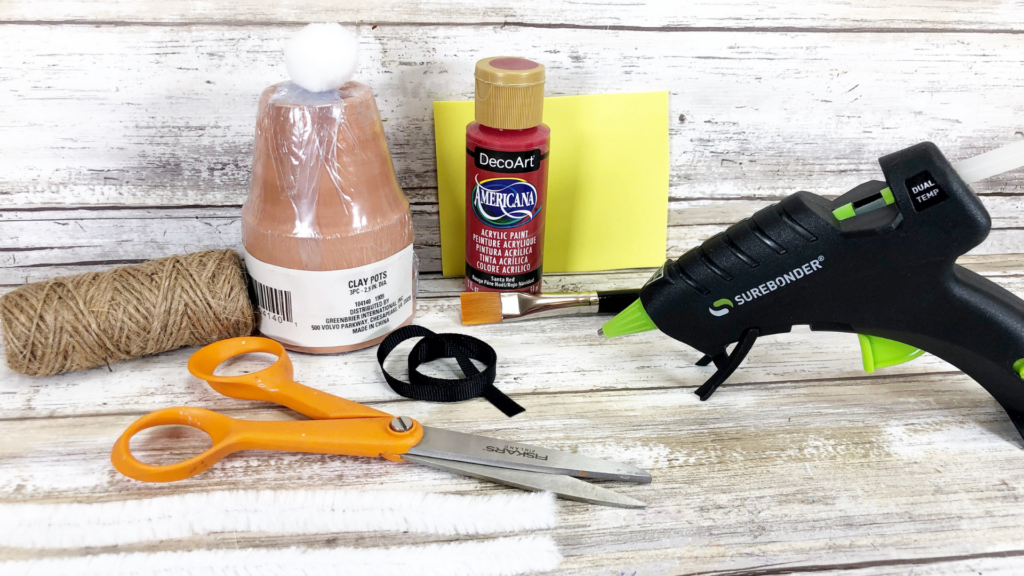
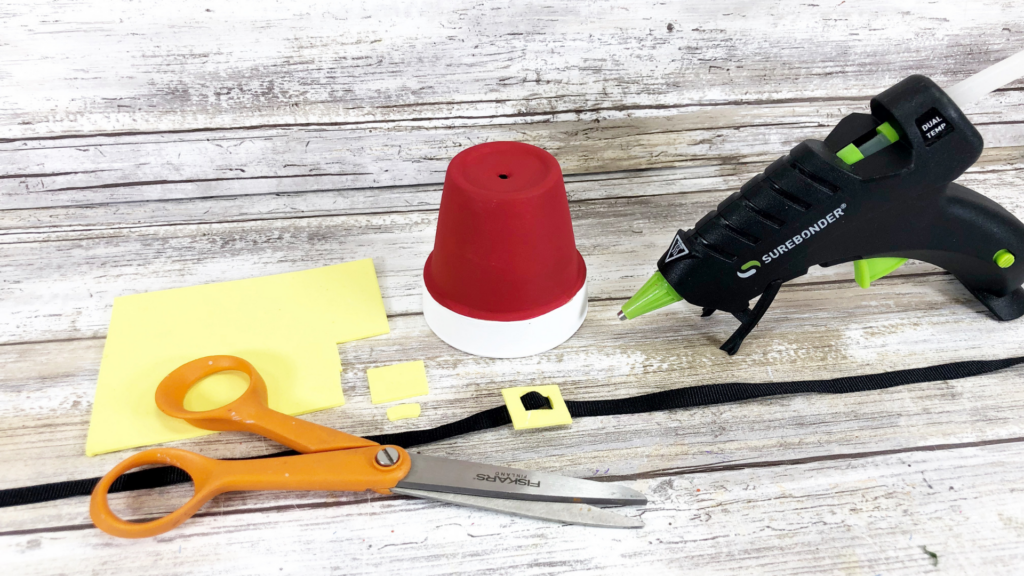
- 2 1/2 inch clay pot
- craft paint in red and white
- jute twine
- black ribbon
- yellow craft foam sheet
- 1 large white pompom
- 2 white pipe cleaners
- glue gun and glue sticks
- scissors
- paint brush
How do you make this Clay Pot Santa Hat Christmas Ornament?
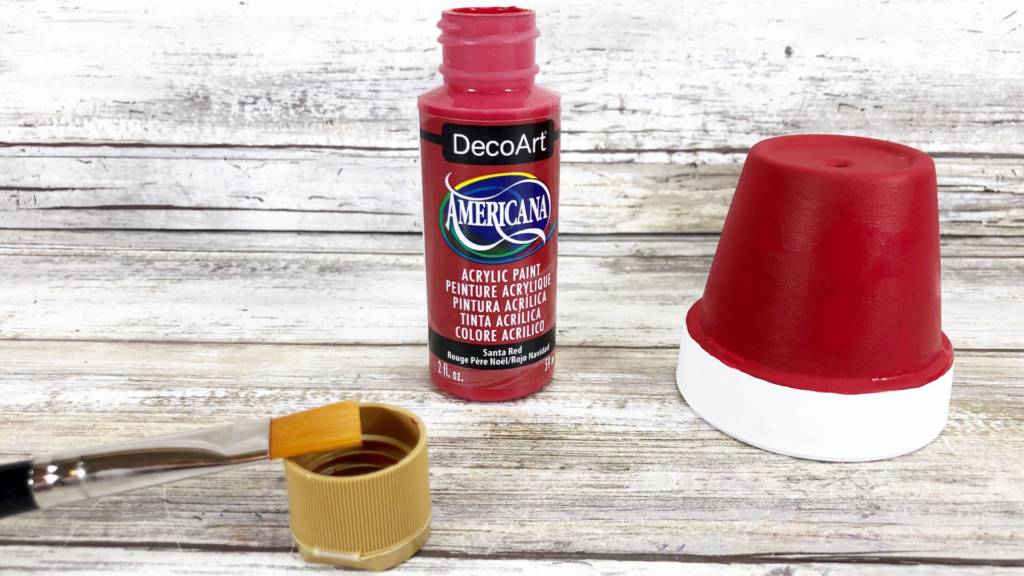
Start by adding a base coat to the rim of the 2.5” clay pot with white acrylic craft paint. Let the paint dry and then apply a second coat, if necessary.
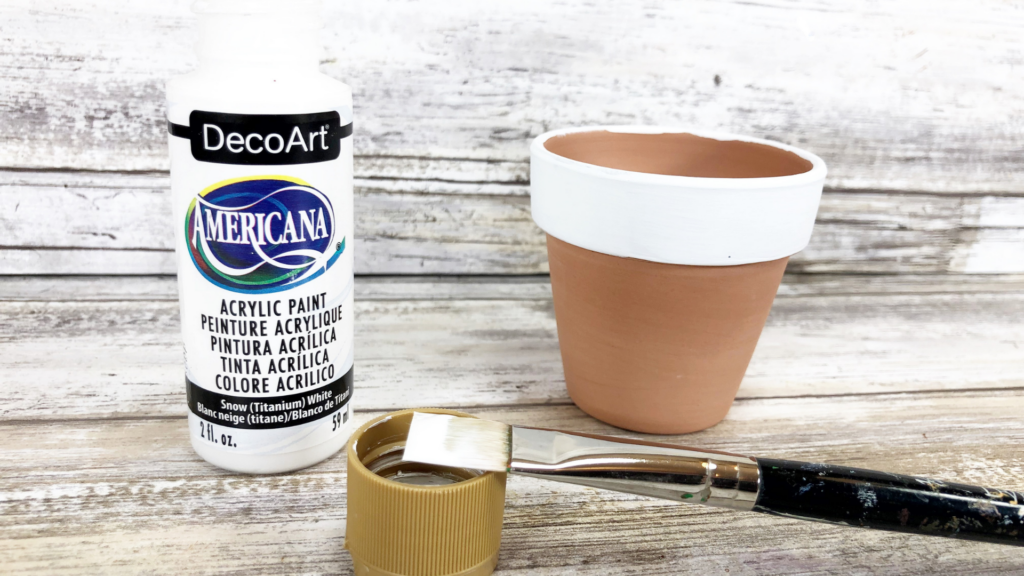
Add a base coat to the rest of the clay pot with red acrylic craft paint. Set aside to dry. Apply a second coat, if necessary.
Cut a square from yellow craft foam, fold in half and cut a smaller square from the center to create a buckle. If you can’t find craft foam at the dollar store, they usually have craft foam shapes and stickers and you can make a little buckle from one of those.
Lay the black ribbon down flat and hot glue the square buckle to it to look like it’s threaded through.
Then, hot glue the ribbon around the clay pot a bit above the white rim.
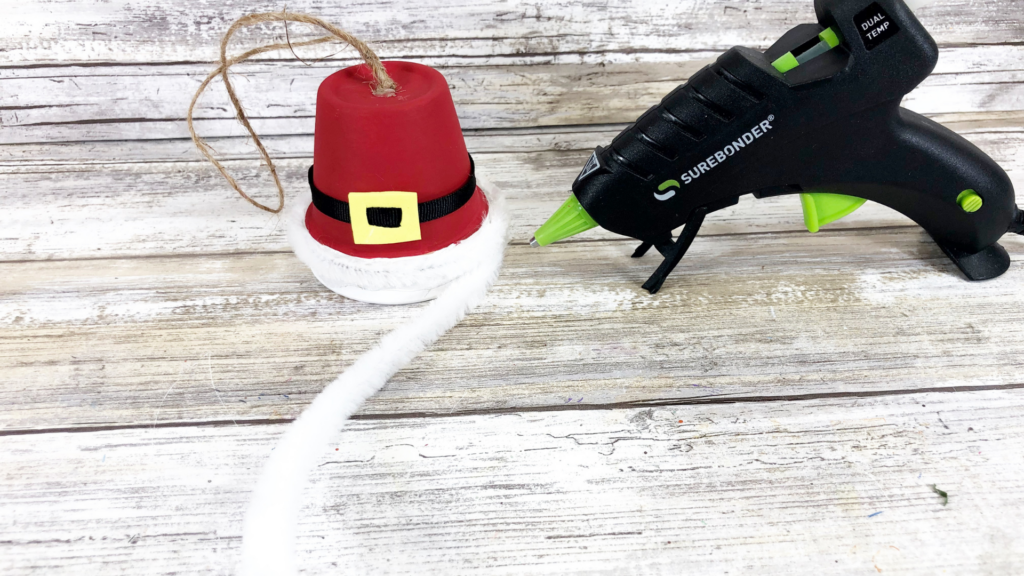
Wrap two white chenille stems around the rim of the clay pot, securing it with the glue gun.
Cut a 12” length of natural jute twine, tie it in a loop with a knot, and attach to the top of the clay pot Santa hat with a glue gun and glue sticks.
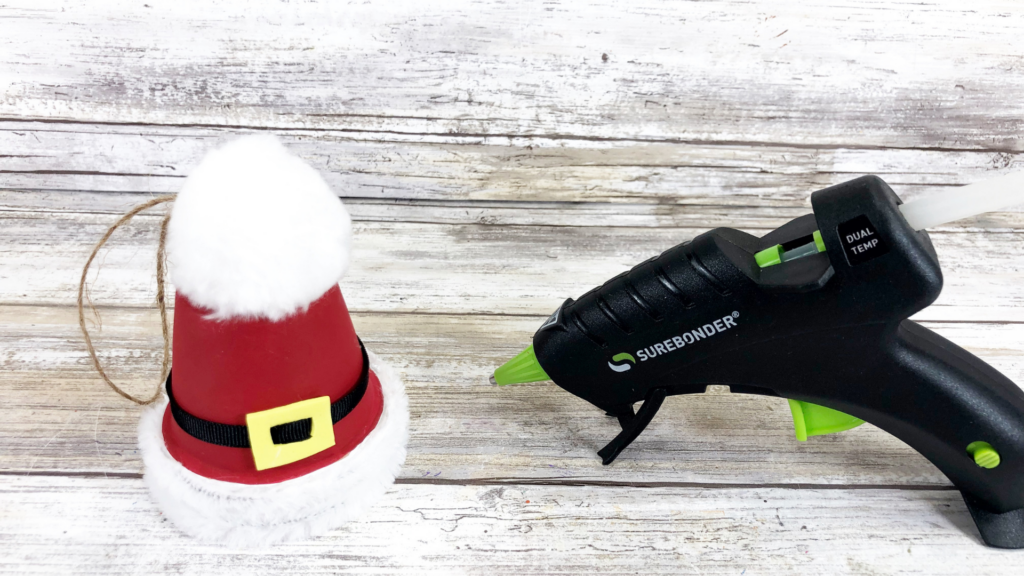
Attach large white pom pom to the top of Santa’s hat with a glue gun and glue sticks.
This is a great family fun craft activity for kids, tweens, and teens. A perfect little handmade gift for the kids to give grandma.
It would also be perfect for a little take home gift as a place card for Christmas dinner, too!
More Christmas Ideas
- How to Make Dollar Tree Snowman Tealight Christmas Ornaments
- Dollar Store DIY Christmas Snow Globes
- How to Make Retro Meme Christmas Ornaments
- Dollar Tree Snowman Mason Jar Ornament
- How to Make Paintbrush Gnomes
Santa Hat Clay Pot Christmas Ornament
Materials
- 2 1/2 inch clay pot
- craft paint in red and white
- jute twine
- black ribbon
- yellow craft foam sheet
- 1 large white pompom
- 2 white pipe cleaners
Tools
- glue gun and glue sticks
- scissors
- paint brush
Instructions
- Add a base coat on the rim of the clay pot with white acrylic craft paint. Let the paint dry and then apply a second coat, if necessary.
- Cut about a 1 -inch square from yellow craft foam. Fold it in half and cut a smaller square from the center to create a buckle.
- Lay the black ribbon down flat and hot glue the square buckle to it to look like it's threaded through.
- Then, hot glue the ribbon around the clay pot a bit above the white rim.
- Wrap two white chenille stems around the rim of the clay pot and glue down with the glue gun.
- Cut about a 12-inch length of natural jute twine, tie it in a loop with a knot, and attach to the bottom of the clay pot with the glue gun.
- Lastly, attach large white pompom to the bottom of the pot, which is now the top of Santa’s hat with the glue gun.
Add a base coat to the rest of the clay pot with red acrylic craft paint. Set aside to dry. Apply a second coat, if necessary.
Notes
TIP: You can use liquid craft glue for this project, but you would have to wait for it to dry.
Come Join Us
Liked this article and want more? Follow along on Instagram, Facebook, Twitter, Pinterest, and YouTube!