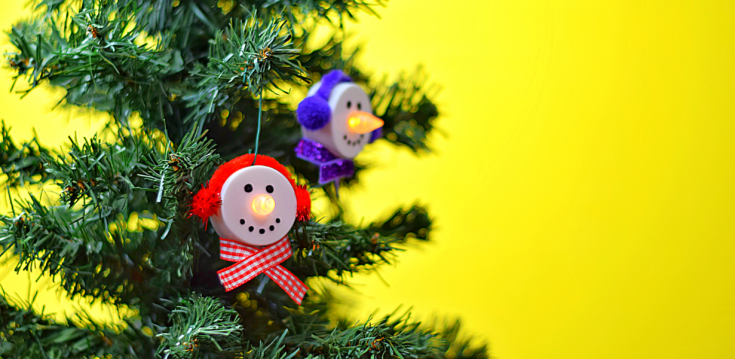
I showed you some funny meme Christmas ornaments the other day. Now, I’ve got some cute little Snowman Tealight Christmas Ornaments with supplies from the Dollar Tree to make with the kids to decorate the tree.

My kids love doing crafts as a family. It’s especially satisfying when it’s something we can instantly display like ornaments on the Christmas tree.
What do you need to make Snowman Tealights Christmas Ornaments?
You can get all of this at the Dollar Tree. The tealights come in a 2-pack. You’ll also need a package of pipe cleaners, a package of pompoms, and a package of ornament hangers.
You probably already have a permanent marker, scissors, and a glue gun at home to make this project.
How do you make Snowman Tealights Christmas Ornaments?
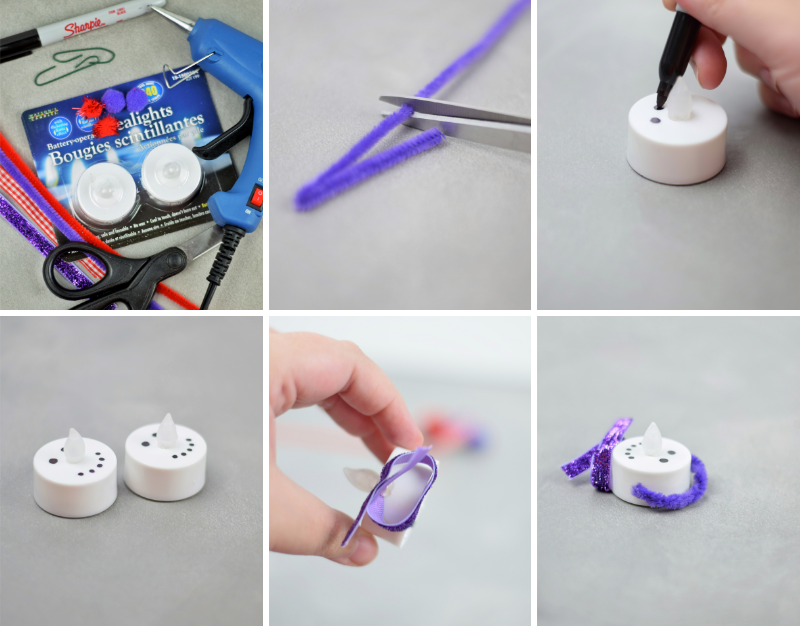
Use your black marker to draw a face onto the tealight. You can use googly eyes if you want, but we prefer the look of simple black dots.
Cut a pipe cleaner at approximately 6”. Fold it into a “V” shape and twist both sides together.
Curve your twisted pipe cleaner around the tealight and add a small dot of hot glue on both ends to hold it in place. Don’t glue it the entire way around because you’ll need to be able to slide the hook under the pipe cleaner later.
Add a generous dab of hot glue where the ears would be and secure the pompoms.
Cut a piece of ribbon at approximately 4 1/2 to 5 inches long for the scarf. Add a small line of glue to the back of the “scarf” and attach it to the tealight.
Crisscross your ribbon and secure it to the front by adding more glue.
The tealight flame is orange when it’s turned on which makes it look like a carrot. This is optional, but if you’d like, you could color the flame orange with an orange permanent marker so that it looks like a carrot even when the tealight is turned off.
Repeat this process for the second tealight (we opted to use different colors for our second one to make them stand out)
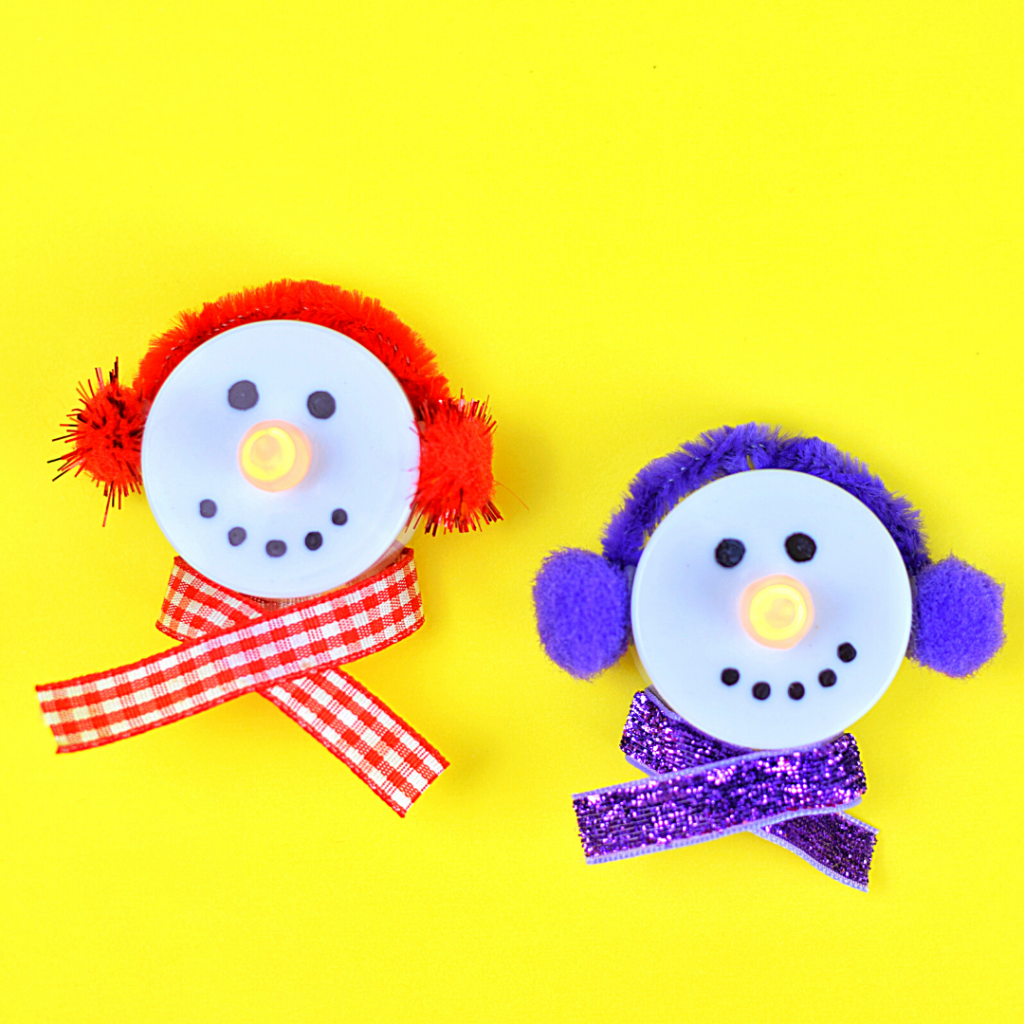
Add the ornament hooks and hang on the tree.
What can you do with Snowman Tealights Christmas Ornaments?
Not only can you make these snowman tealights into Christmas ornaments, but you can also leave off the ornament hooks and use them as decorations on a tablescape or even displayed on the mantle.
More Christmas Ornament Ideas
Snowman Tealights Christmas Ornaments
Materials
- Battery operated tea lights
- Black permanent marker (we used sharpie)
- Ribbons (your color of choice)
- Pipe Cleaners (your color of choice)
- Pom Poms (your color of choice)
- Ornament hooks
Tools
- Glue Gun (and glue sticks)
- Scissors
Instructions
Use your black marker to draw a face onto the tea light. You can use googly eyes if you want, but we prefer the look of simple black dots.
Cut a pipe cleaner at approximately 6”. Fold it into a “V” shape and twist both sides together.
Curve your twisted pipe cleaner around the tea light and add a small dot of hot glue on both ends to hold it in place.
Add a generous dab of hot glue where the ears would be and secure the pompoms.
Cut a piece of ribbon at approximately 4-5 1/2 inches long for the scarf. Add a small line of glue to the back of the “scarf” and attach it to the tea light.
Crisscross the ribbon and secure it to the front by adding more glue.
Optional: To make the tealight look more orange like a carrot when it's not lit up, use an orange permanent marker and color the flame orange.
Add the ornament hooks and hang on the tree.
Liked this article and want more? Follow along on Instagram, Facebook, Twitter, Pinterest, and YouTube!