You have no idea how much I love to buy craft supplies at the dollar stores. It’s like a treasure trove where you never know what craft supplies you’re going to find or that will inspire you to make something like this Fall Leaves Banner.
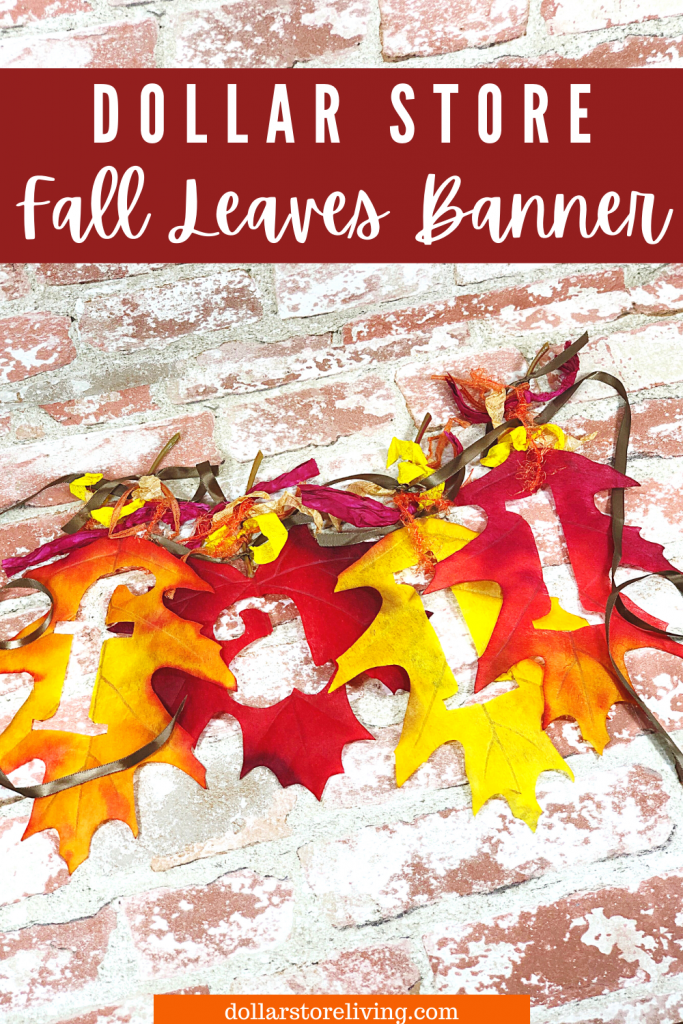
Upcycle extra-large Dollar Store faux fall leaves into a fun and trendy Banner to welcome the cooler weather! This project goes together in about 15 minutes with limited supplies, most of which you probably already have on hand.
This is an easy craft that is perfect for hanging across the mantle or adding to a wreath, or even to decorate as part of a centerpiece on the table.
What do you need to make this Fall Leaves Banner?
- Dollar Store Leaves – 4 extra-large, assorted colors (the ones shown are 9” by 6”)
- Ribbons – assorted colors and styles
- Permanent Marker – fine tip
- Scissors
- Craft Knife
- Self-Healing Mat (or piece of cardboard)
- PATTERN
Download the Pattern
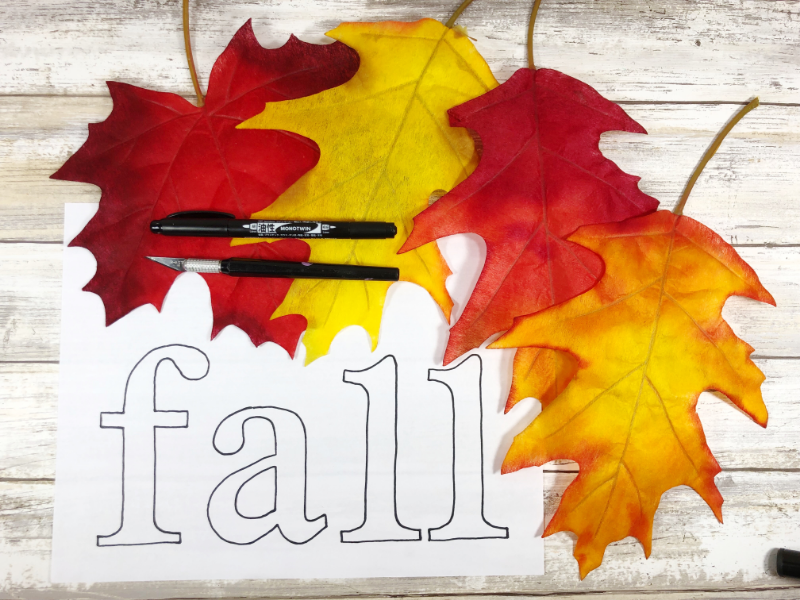
Print and cut out each letter with scissors. These are large leaves, 9 x 6 inches, so if your leaves are smaller scale the pattern down your computer in the print controls to fit any size faux fall leaves.
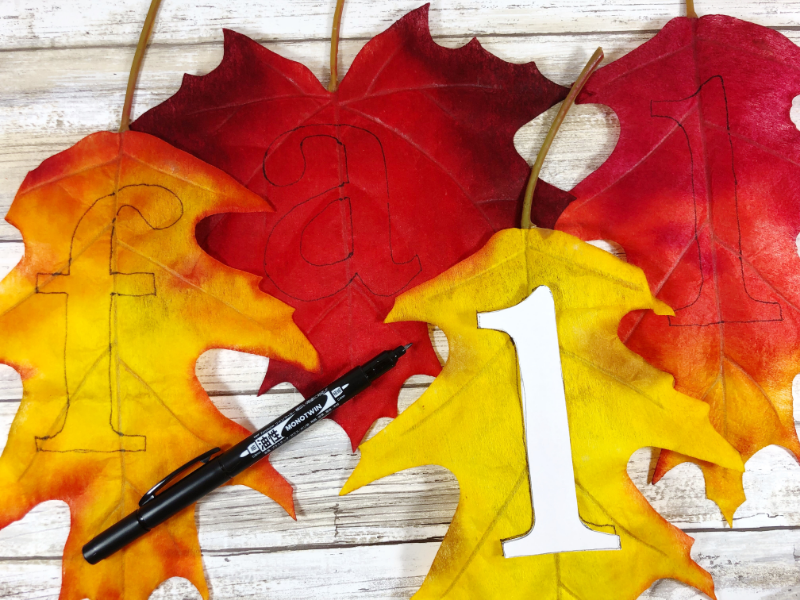
Trace each letter onto each leaf with a fine point permanent marker. You can skip the center of the lower case “a” as it won’t be cut out.

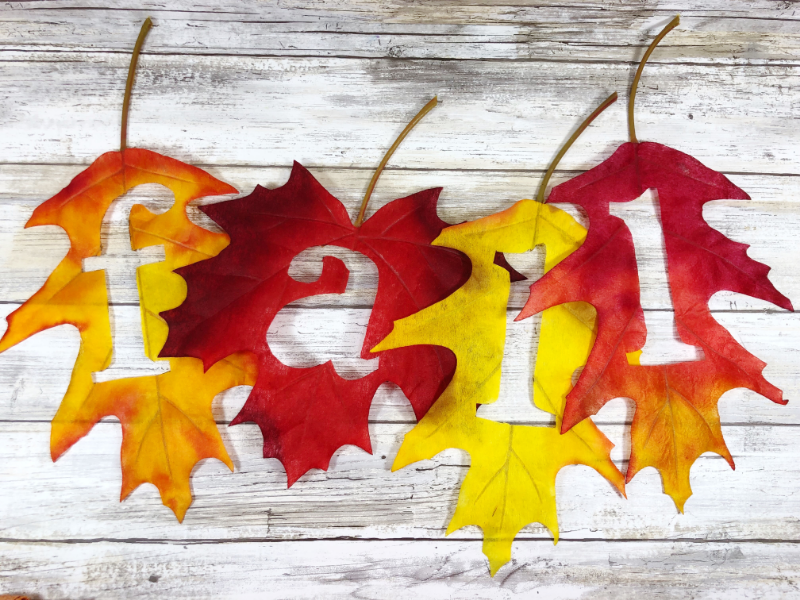
Start with an Exacto knife to cut out the letters and then finish up with a pair of small detail scissors. If you are a sewist and have applique scissors, these work well, too. Use the very tip of the scissors to cut out the curves and take your time.
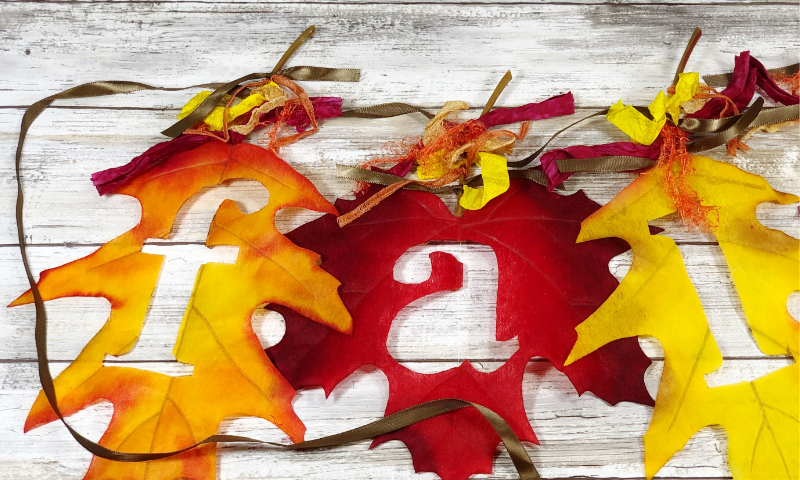
Cut one 36-inch length of ribbon and starting in the center, tie each leaf stem to the ribbon with a double knot.

Tie 4-6 assorted ribbon scraps of coordinating colors to the stem of each leaf.
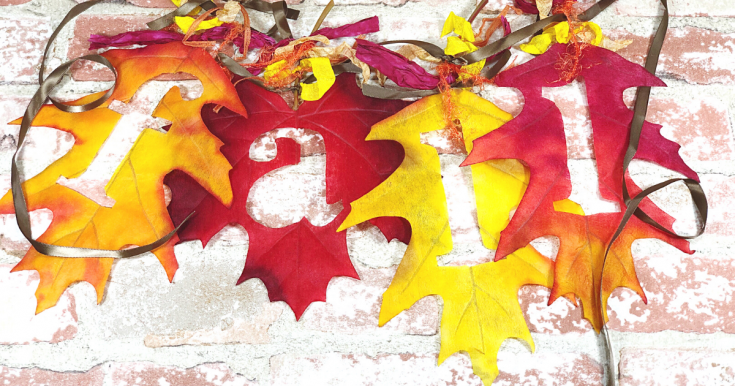
And you’re done!
Hang on a mantel, banister, across a table runner, or door to celebrate fall. With a dozen leaves per package this quick and easy Dollar Store Fall Leaf Banner is the perfect gift for a teacher, neighbor or friend!
Fall Leaves Banner
Materials
- Dollar Store Leaves – 4 extra-large, assorted colors (the ones shown are 9” by 6”)
- Ribbons – assorted colors and styles
Tools
- Permanent Marker – fine tip
- Scissors
- Craft Knife
- Self-Healing Mat (or piece of cardboard)
Instructions
Download the pattern for FALL letters. It can be scaled on your computer in
the print controls to fit any size faux fall leaves.
Carefully trace each letter onto each leaf with the fine point of a permanent marker. Remembering that the center of the lower case “a” will not need to be cut out.
Start with a craft knife to cut out the letters. Then, finish up with a pair of small detail
scissors. Use the very tip of the scissors to cut out the curves and take your time.
Cut one 36” length of ribbon and starting in the center, tie each leaf stem to the ribbon with a double knot.
Tie 4-6 assorted ribbon scraps of varying colors to the stem of each leaf.
Now it's ready to hang!
Liked this article and want more? Follow along on Instagram, Facebook, Twitter, Pinterest, and YouTube!