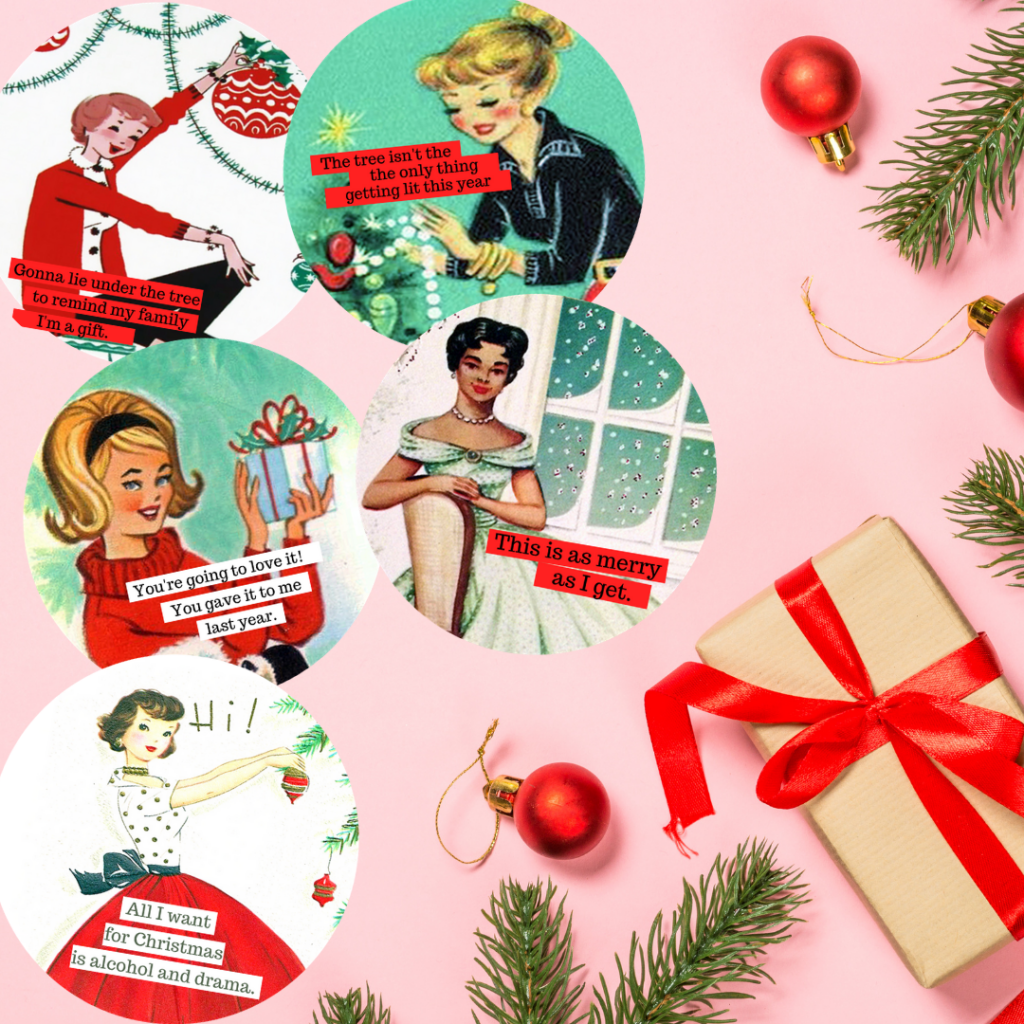
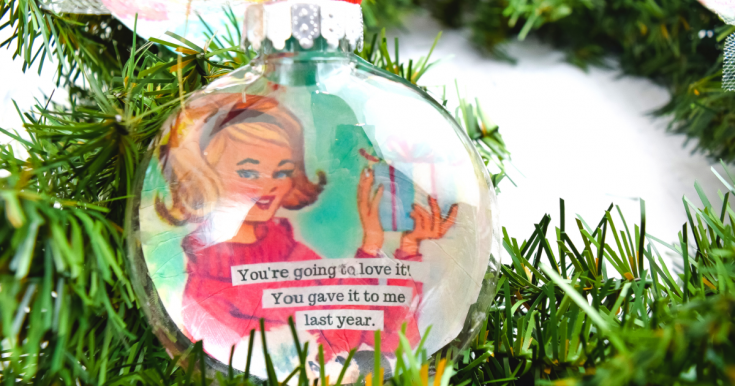
I love retro or vintage funny memes. I frequently buy them as magnets and put them on my fridge. I decided to make some of my own as Retro Meme Christmas Ornaments.
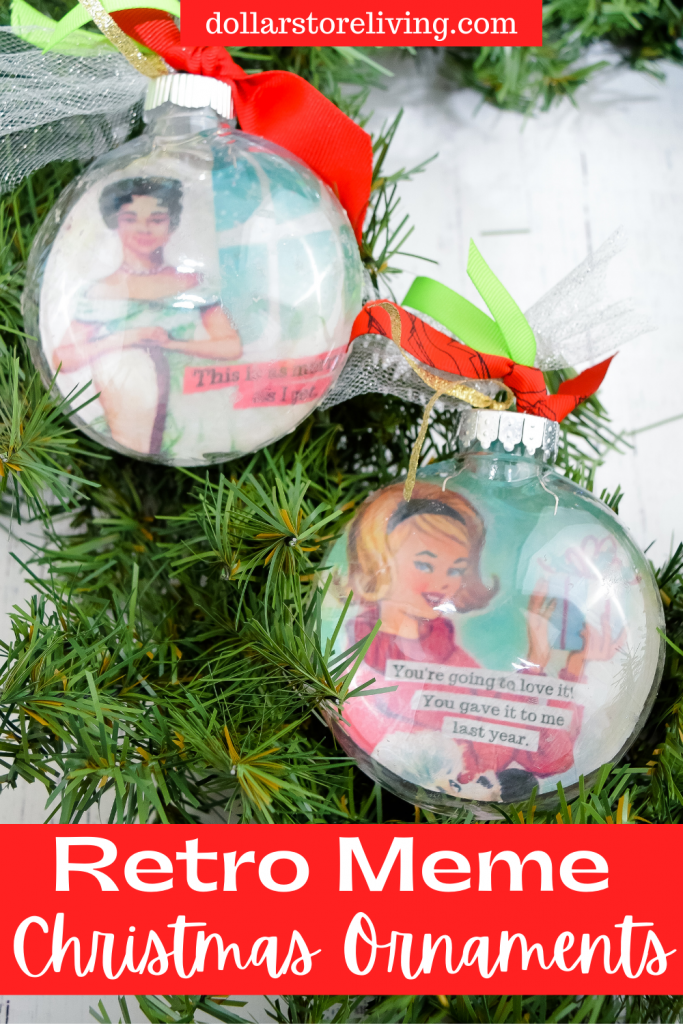
I love vintage postcards. I collect ones I find in antique malls that have writing on them. It’s like reading short little diaries. I just love it.
I love using the vintage postcards in craft projects. These Retro Meme Christmas Ornaments. These are printed images I cropped into circles and then added snarky little comments. I like to print them out on regular copy paper and decoupage with Mod Podge.
What do you need to make these Retro Meme Christmas Ornaments?
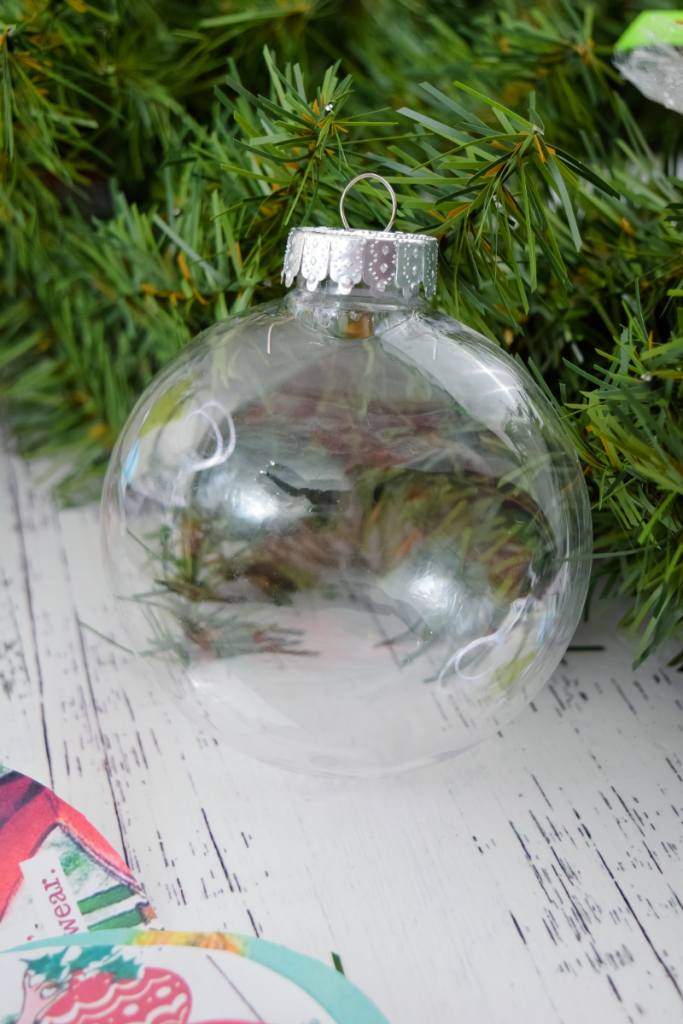
They are made with plastic disc ornaments. The ones available at Dollar Tree are about 5 inches in diameter. You’ll also need some Mod Podge. For this type of craft, I like to use the Mod Podge made for paper.
You’ll also need my free printable with the Retro Christmas Memes.
Get the Files
Can kids make these Christmas ornaments?
Yes! I recommend ages tween and up. My 10 year old loved making these ornaments with me.
How do you make these Retro Meme Christmas Ornaments?
This craft is very simple, but nuanced as you’re essentially gluing a flat image to a slightly rounded disc.
First, remove all the metal ornament toppers and set them aside until the ornaments are dry.
Cut out the images from the printables. Take one image at a time and paint it with a thin layer of Mod Podge.
Now, carefully center the image on one side of the disc ornament. I start with the middle of the image and work my way outward using my fingers to gently flatten the image to the disc.
You will have some wrinkles. I try to keep the wrinkles away from the main image or the person’s face. Don’t worry because you can get most of the wrinkles out with your fingers, so they are at just the outer edges.
Take the paint brush and add a second layer of Mod Podge to the back side of the image, especially close to the edges. Then, use your thumbs to smooth out the image more. This gets most of the wrinkles out, and when you flip the ornament over and look at it from the other side, you won’t be able to see hardly any wrinkles if any.
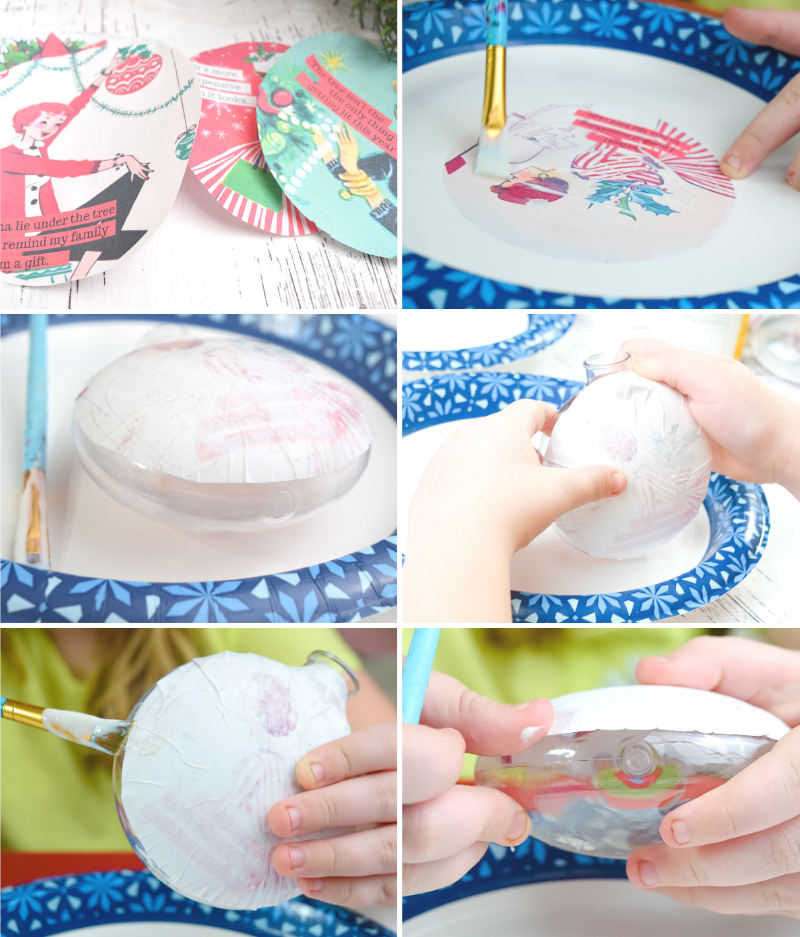
With the larger images and the disc ornaments, sometimes the images go up a bit on the neck of the ornament. That is okay, it still looks really good from the other side.
Allow them to dry completely before adding the metal ornament toppers back on.
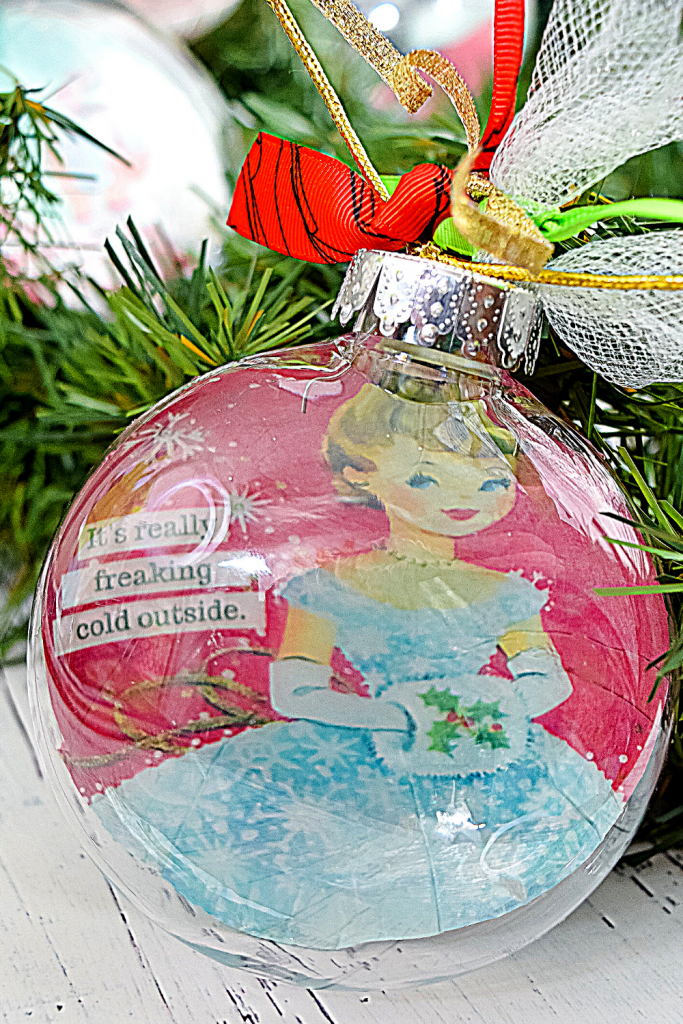
Finish your Christmas ornaments with scraps of ribbon and tulle in red, green, silver and white colors.
You can hang them on a Christmas tree, hang on a garland, decorate the mantle, and attach to presents or a gift basket as an additional gift
Can you add glitter to these Christmas ornaments?
I tried it and DO NOT recommend it as really hides the images. However, I have found if you use more of an iridescent glitter and use it very sparingly, you can hide the snarky little phrases if you don’t want those noticed as much.
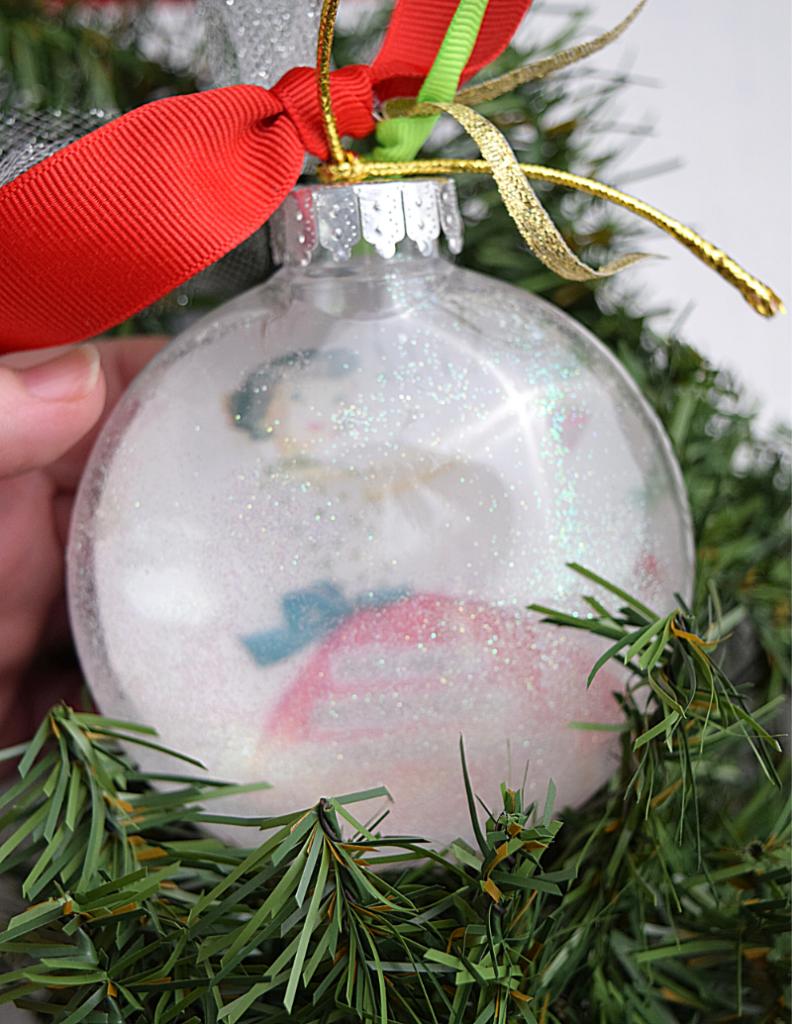
If you do want to try it, I used Mod Podge spray sealer and sprayed a puff or two inside the ornament, added a little paper funnel to add about 1/2 teaspoon of glitter and shook it around and poured the leftover out.
More Christmas Crafts
Retro Meme Christmas Ornaments
Materials
- 4-6 plastic disc ornaments
- Mod Podge
- Vintage Printables
- Ribbon scraps
- Tulle scraps
Tools
- Paint Brush
- Scissors
Instructions
Remove all the metal ornament toppers and set aside until the ornaments are dry.
Cut out the images from the printables. Take one image at a time and paint it with a thin layer of Mod Podge.
Center the image on one side of the disc ornament starting with the middle of the image and work outward using your fingers to gently flatten the image to the disc.
Some wrinkles are ok. Try to keep the wrinkles away from the main image or the person's face. You can get most of the wrinkles out with rubbing your fingers, so they are at just the outer edges.
Take the paint brush and add a second layer of Mod Podge to the back side of the image, especially close to the edges. Use your thumbs to continue to smooth out the image more.
If needed, the larger images sometimes go up a bit on the neck of the ornament.
Allow the ornaments to dry completely before adding the metal ornament toppers back on.
Finish by knotting pieces of scraps of ribbon and tulle in Christmas colors on the loop of the metal topper.
Liked this article and want more? Follow along on Instagram, Facebook, Twitter, Pinterest, and YouTube!